How To Make A Vertical Succulent Garden in 7 Easy Steps
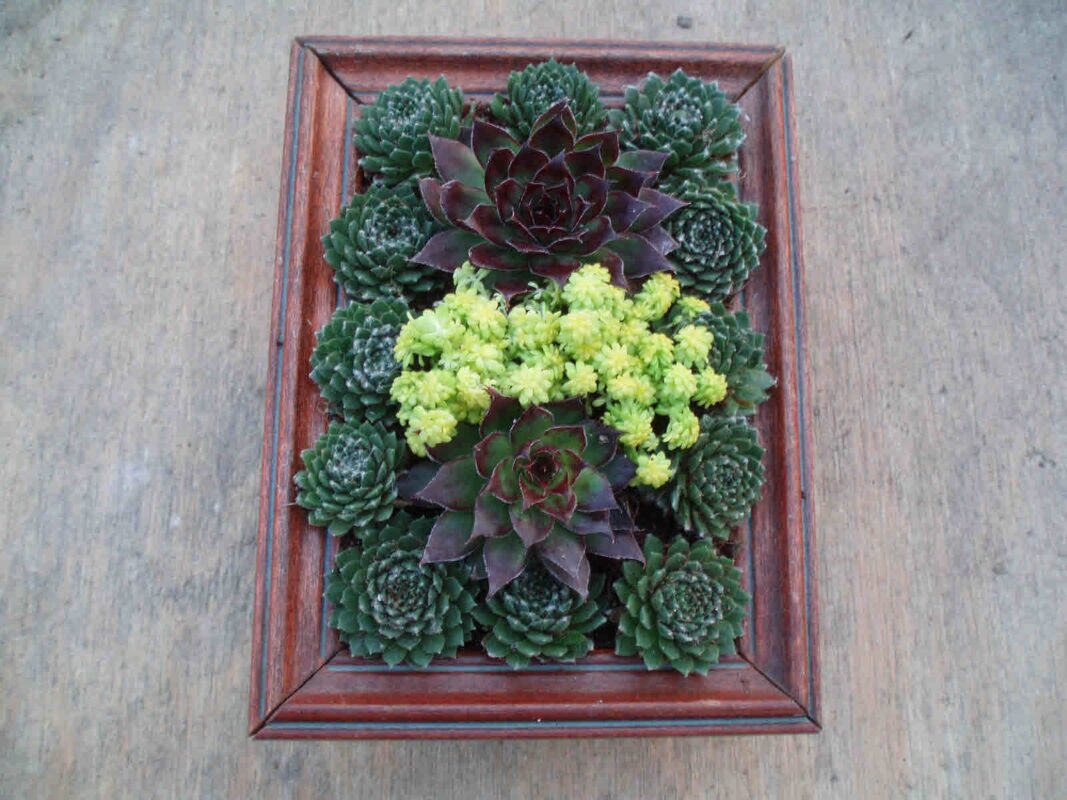
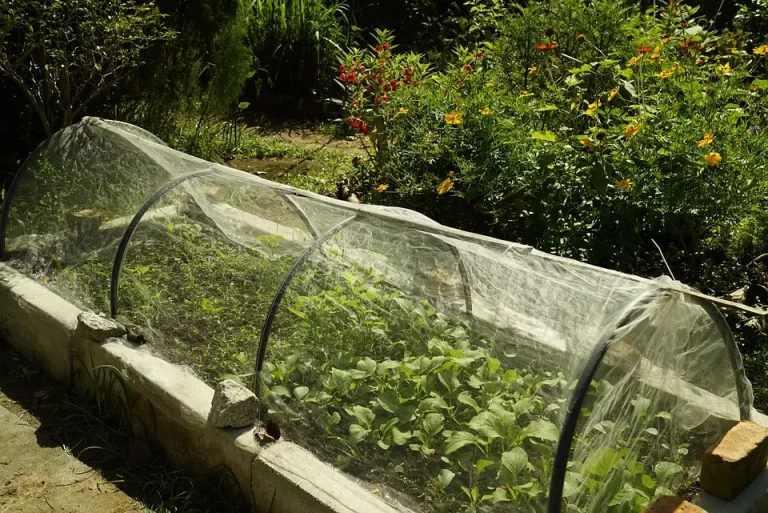
Vertical succulent garden art makes a beautiful addition to a patio garden. They are easy to make and simple to grow. You only need a few tools, lumber, and maybe an old picture frame. We show you how to do it in this DIY vertical succulent garden blog post.
Materials & Tools Needed For A Vertical Succulent Garden

Materials
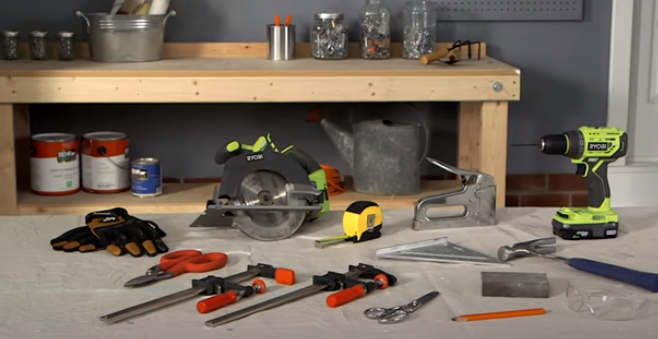
Tools
STEP 1 – Mark and Measure
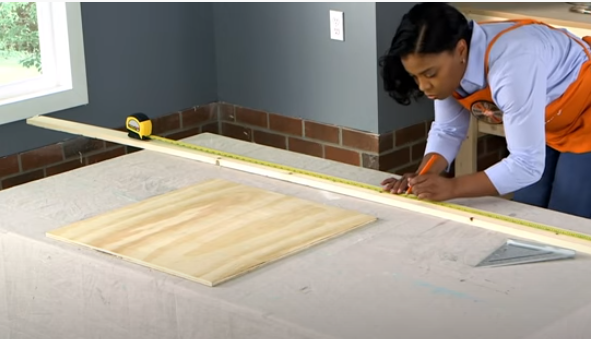
Using the measuring tape and pencil, measure and mark the pieces you will need. Take the 8′ common board and mark 2 pieces that are 16 3/4″ long and 2 pieces that are 15 1/4″ long. Next, take the 1/2″ piece of plywood and measure out a square that is 16 3/4″ X 16 3/4″. You can use a scrap piece of wood to draw your lines.
STEP 2 – Make Your Cuts for the Vertical Succulent Garden
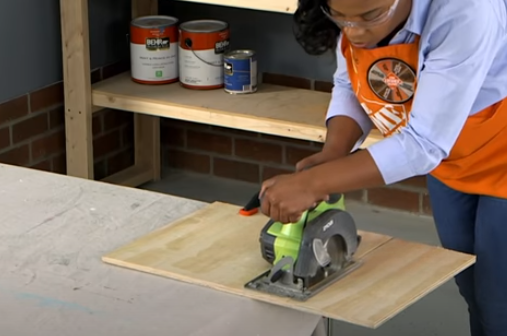
Use the circular saw to cut the pieces of wood that you marked. Make sure to wear gloves and safety goggles when you cut the wood so you do not get sawdust in your eyes. Line the sawblade up to the right of the measured line to keep the measurements accurate. At this time, if you are planning to paint or stain your project, give all of the pieces a good sanding with the sanding block. Then, paint all the pieces before assembly.
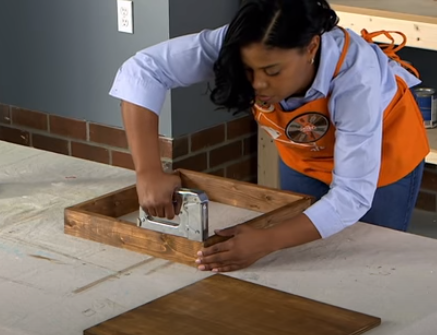
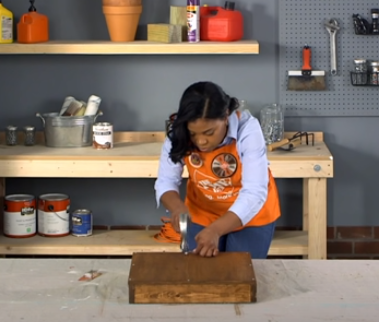
STEP 3 – Build The Frame
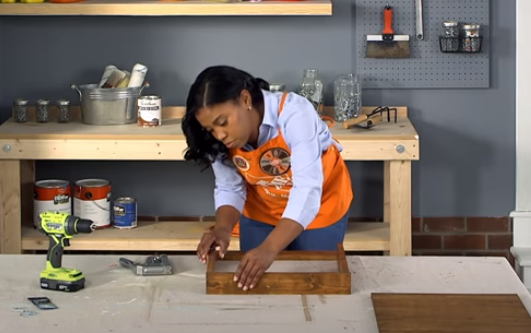
Take your two 16 3/4″ pieces of common board and place them on their ends across from each other. Place the two 15 1/4″ pieces of common board between them to create a square. Take the staple gun and staple each corner to help secure it. Pre-drill holes in the 16 3/4″ ends to attach the boards together with your 1 1/2″ wood screws.

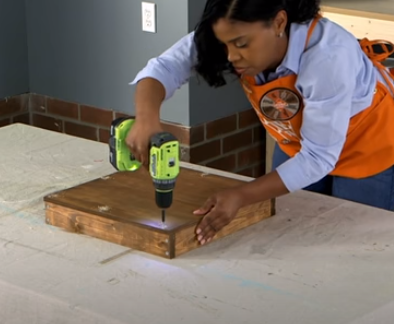
Take the 1/2″ piece of plywood and place it over the square frame of common boards. Pre-drill holes around the edges and attach the plywood to the frame. You should have at least 3 screws per side. You have completed the frame for your vertical succulent garden.
STEP 4 – Line The Frame

Unfold the heavy duty drop cloth and cut out a piece that is roughly 22″ X 22″. Place the piece of plastic into the frame and smooth it to the corners and edges. Cut off excess plastic, then fold the plastic inward so the plastic is below the inside edge of the frame. The plastic will protect the wood and hold in moisture for the vertical succulent garden. Use the staple gun to staple the plastic to the inside of the frame.
STEP 5 – Steel Hardware Cloth Installation
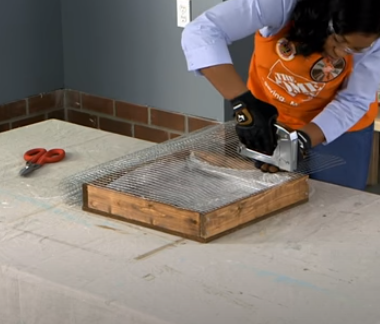
Put on some work gloves and align your hardware cloth along one edge of your frame. Roll out the hardware cloth across the top of the frame. Use the staple gun to attach the cloth to the frame by stapling along each side. Use wire snips to cut off excess hardware cloth so your vertical succulent garden covers any wire showing around the edge. Optionally, you can cut a picture frame to fit around the edges. Nail the picture frame over the wire so the wire is sandwiched between the picture frame and the box frame below.
Turn the frame over to attach sawtooth hangers to the back side of your frame. Make sure the hangers are heavy-duty, to hold the frame, soil, and plants. Center and level the hangers about 1 1/2″ down from the top, so your vertical succulent garden hangs straight on the wall.
STEP 6 – Fill the Vertical Succulent Garden With Soil

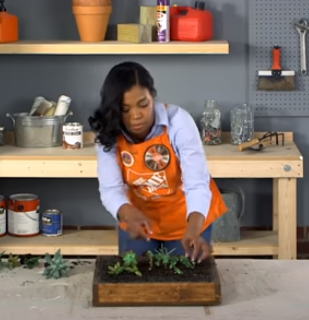
Fill the frame with a neutral potting soil of pH 6.5-7. Smooth it out and add enough so it is all the way up to the steel hardware cloth. You can lift up the frame and hit is sharply on the table to settle the soil in the frame. Moisten the soil so it is damp but not swimming in water. Prune the succulents by removing a few lower leaves. The stem pieces should be 1″-2″. Stick the stems down through the steel cloth and into the soil.
STEP 7 – Let Your Vertical Succulent Garden Root
Put your succulent garden frame flat out in a sunny location in your garden for about 4 weeks so your plants can establish roots. Then, hang it up in a sunny location in your patio garden or on a sunny interior wall.
Conclusion
Success! You have completed making a vertical succulent garden. These instructions are from a Home Depot YouTube Video linked here about a DIY vertical succulent garden. My husband saw this post and has decided to try to make one of these. When he does, I will replace the photos with some of his project. Have you made one? Please let me know in the comments below.