Simple Bird Feeder Plans You Can Build
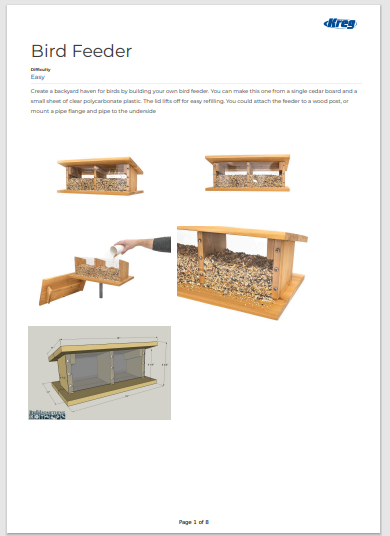
Free Simple Bird Feeder Plans – Online or Printable PDF
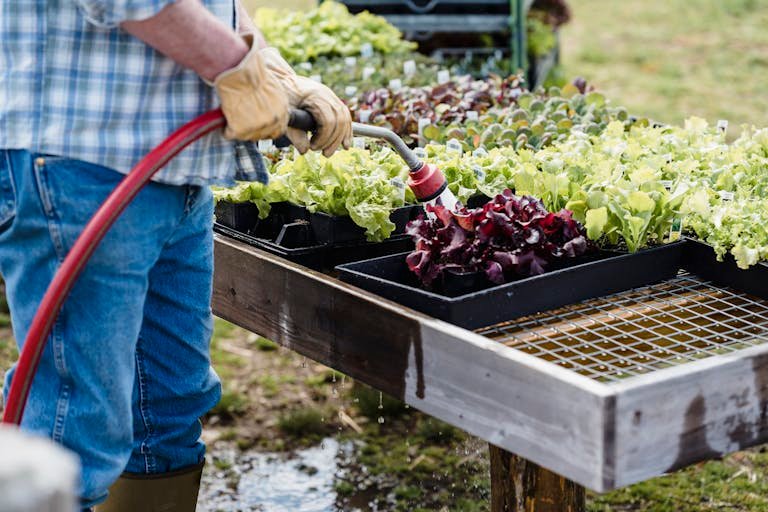
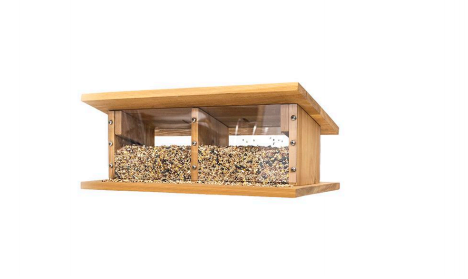
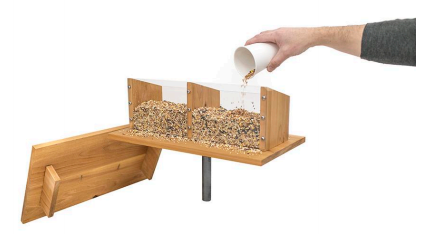
Create a backyard restaurant for birds by using these simple bird feeder plans. You can make this one from a single cedar board and a small sheet of clear polycarbonate plastic. The lid lifts off for easy refilling. You could attach the feeder to a wood post, or mount a pipe flange and pipe to the underside, or hang it in a tree (but watch out for squirrels!). These free plans are provided by Kreg Tools website. Visit their website for great pocket jigs. They do not have an affiliate program for sales but when our website grows up, we would like to sell their products.
By joining our email list, you will get the free 8-page printable bird feeder instructions PDF and other future freebies. When you input your information and click Yes, a confirmation page will appear with a blue link to the PDF. It is saved to the media files of this website so you will not be directed to another website. We never sell email address information and appreciate your support to help us grow. The more people subscribe, the more Google will show our site to other gardeners. Or, you can follow the instructions we provide in this blog post below.
Tools & Materials
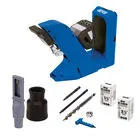
Tools
- 6″ Wood Project Clamp
- Pocket Hole Jig
- Miter Saw
- Square
- Tape Measure
- Drill
- Sander
Materials For Simple Bird Feeder Plans
Wood Products
- 1 Board , 1×6 , 96″
Hardware & Supplies
- 8 1 1/4″ Pocket-hole Screws
- 18 #10 X 3/4″ Pan-head Exterior Wood Screws
- 10 #10 X 1 1/2″ Pan-head Exterior Wood Screws
- 1 .093″ X 12″ X 24″ Polycarbonate Sheet
- 1 Polycarbonate Plastic Cutting Tool
- 1 Waterproof Wood Glue
Cut List & Parts
- 2 Top Board , 3/4″ X 5 1/2″ X 18″ Cedar
- 2 Bottom Board , 3/4″ X 5 1/2″ X 18″ Cedar
- 3 Divider , 3/4″ X 5 1/2″ X 6 1/4″ Cedar
- 2 Top Cleat , 3/4″ X 1 1/2″ X 5 1/2″ Cedar
- 1 Front Window , .093″ X 6″ X 16″ Polycarbonate
- 1 Back Window , .093″ X 4 1/2″ X 16″ Polycarbonate
Instructions: 1. Make Top & Bottom
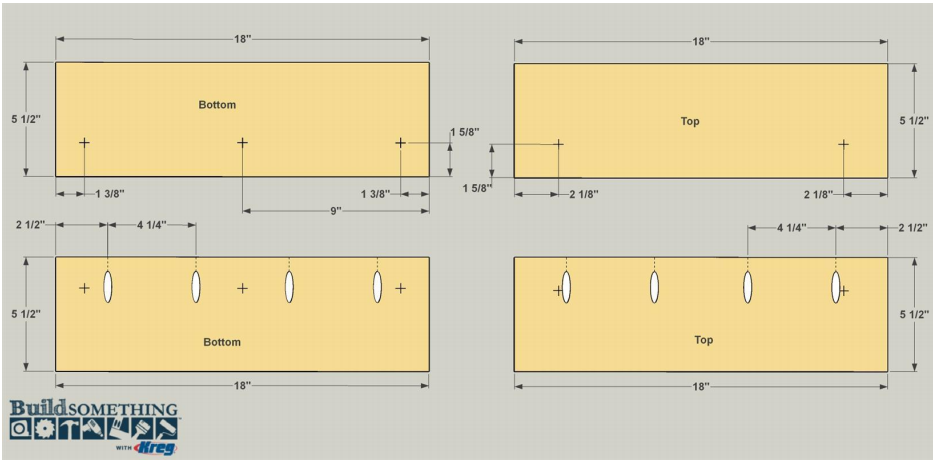
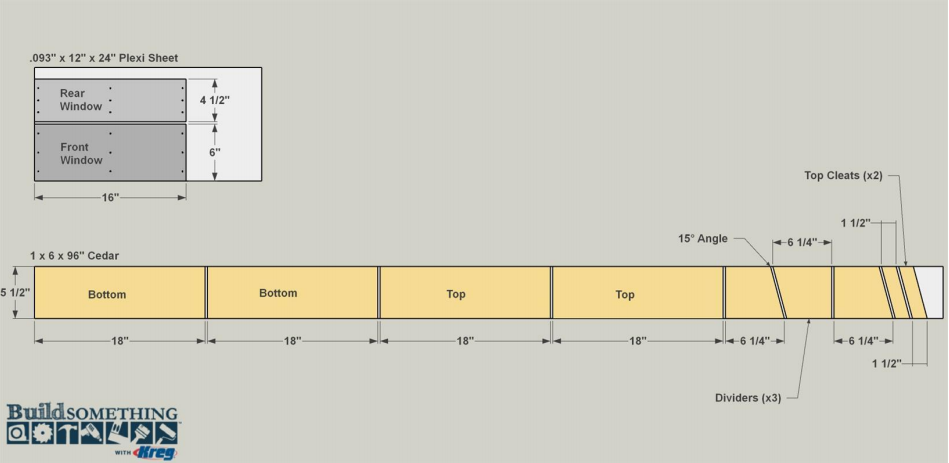
Start by cutting two Bottom boards and two Top boards to size from 1×6 cedar, as shown in the cutting diagram. Set your Jig for 3/4″-thick material and, in just one Top and one Bottom board, drill pocket holes at the locations shown above (white ovals). If your cedar board has one rough face and one smooth face, be sure to drill the pocket holes in the rough face. Lay out the locations for three pilot holes on each of the Bottom boards, as shown (plus signs). Lay out two pilot holes on each of the Top Boards, as shown (plus signs). Drill the holes through all of the boards using an 1/8″ drill bit for these simple bird feeder plans.
2. Assemble The Top & Bottom Panels Of The Simple Bird Feeder Plans
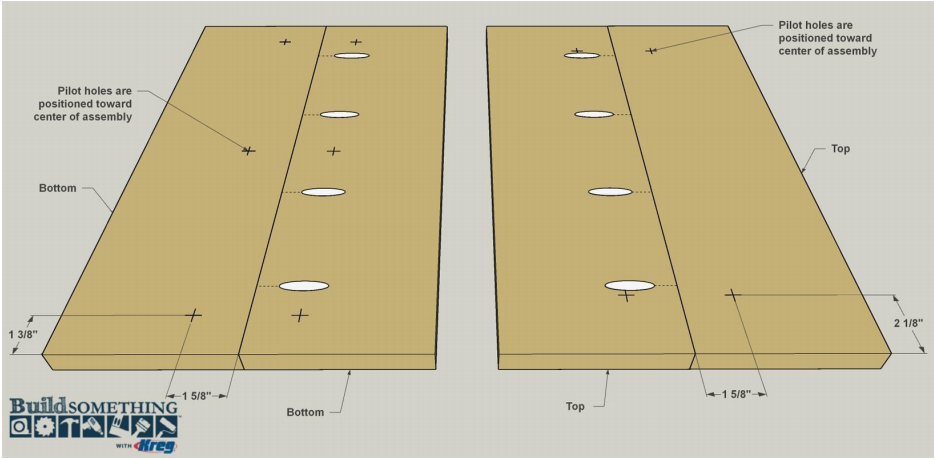
Image shows the 2 Bottom boards on the left side and the 2 Top boards on the right side. First, align the 2 Bottom boards as shown above (left side). Apply waterproof wood glue to the mating edges (middle) of the Bottom boards, and clamp the 2 Bottom boards together. Secure them with 1 1/4″ pocket hole screws (white ovals).
Repeat the same process for the 2 Top boards (right side) to complete the assembly of Top & Bottom of the simple bird feeder plans.
3. Cut Dividers & Cleats
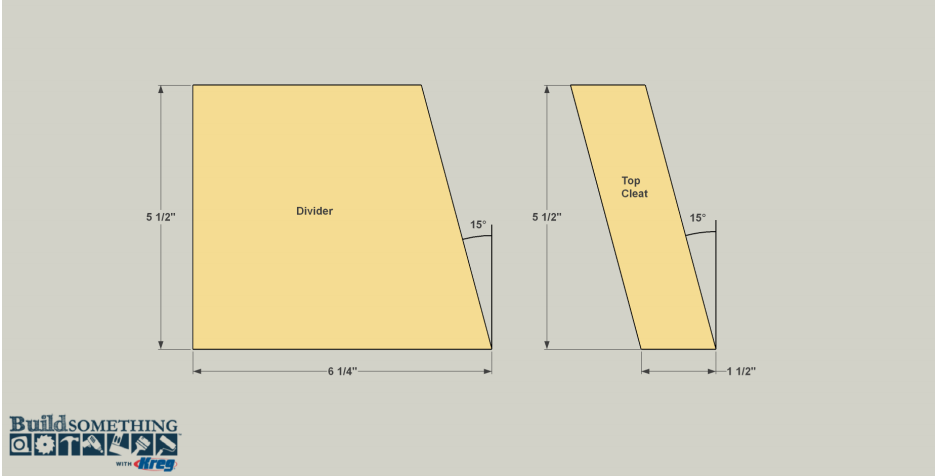
Use the Miter Saw to cut the Dividers and Cleats. When cutting short pieces on the miter saw, it’s always a good ideal to cut them from the ends of a longer board. This allows you the ability to keep your hands at a safe distance from the blade, yet keep the material stable enough for cutting. (Refer to the cut diagram above.) Angle your miter saw to 15° and then, using the remaining portion of the cedar board, cut the two Top Cleats to length. Next, cut the three Dividers to final length, as shown. Note that each Divider is cut square (0°) at one end, and cut at 15° at the other end.
4. Attach The Dividers
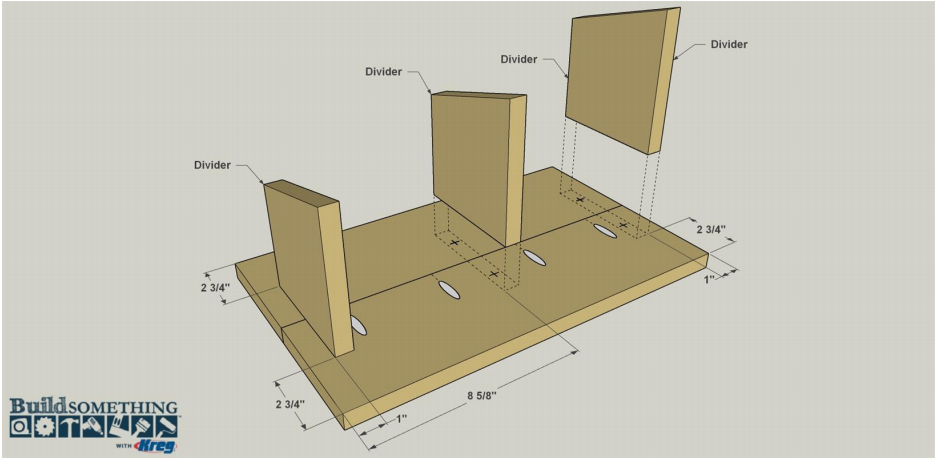
Mark the locations of the three Dividers on the Bottom panel, as shown, so that the Dividers align with the pilot holes you drilled earlier (plus signs). Apply glue to the bottom edge of the first Divider, and then clamp it in place. While the clamps are still in place, use the pilot holes in the Bottom as guides to extend the 1/8″ pilot holes in to the Dividers. These holes will prevent splitting the wood as you drive in screws. Now secure the Divider to the Bottom by driving two #10 x 1 1/2″ exterior pan-head wood screws into the holes. Repeat this process for the other two Dividers.
5. Make The Clear Windows
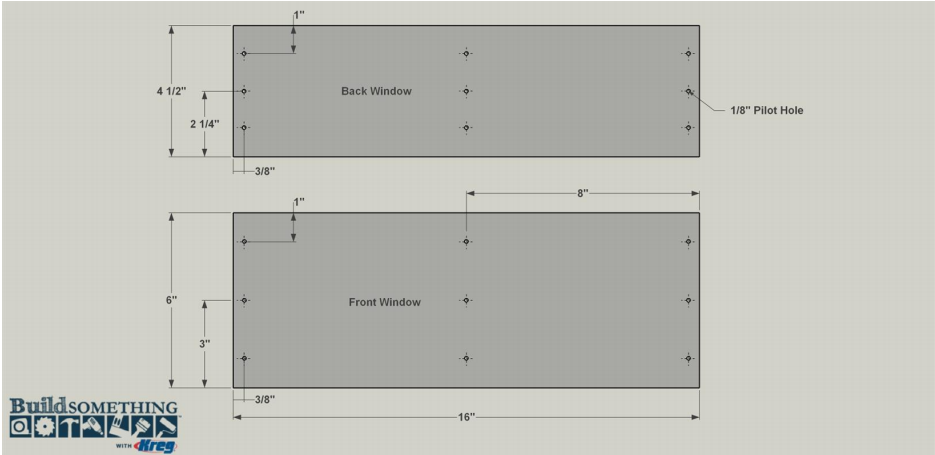
Cut the Front Window and Rear Window to size from a sheet of .093″-thick polycarbonate (Lexan Plastic), as shown in the cutting diagram. You can cut this material using an inexpensive scoring cutting tool that’s available where the polycarbonate plastic is sold. Sand the cut flat by hand using 120-grit sandpaper. Now lay out the hole locations shown in each Window (plus signs). Then, drill the holes using a 1/8″ drill bit. Make sure you have the plastic supported on a scrap of wood to prevent bending, which could cause the polycarbonate plastic to crack.
6. Drill Windows Mounting Holes
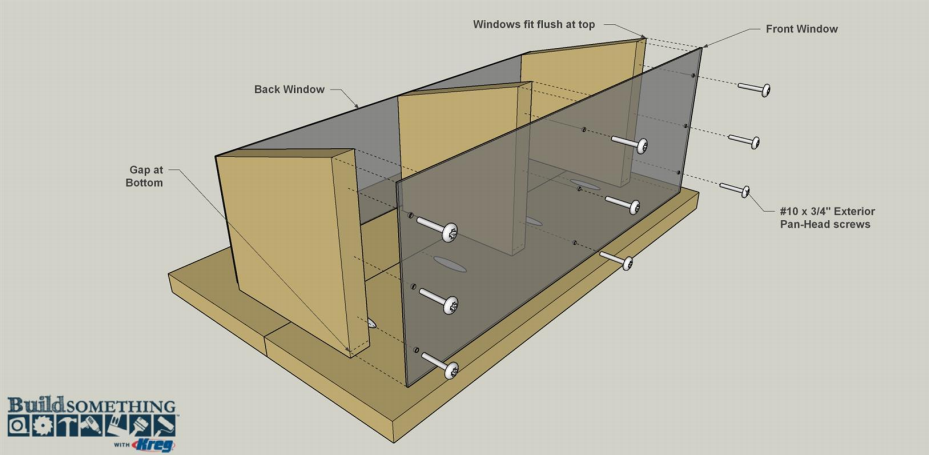
Position the Front Window and Back Window against the Dividers so that the upper edge of each is flush with the sloped upper end of the Dividers. Use clamps or masking tape to hold the Windows in place at the top of all three Dividers and flush with the faces of the outside Dividers. With a sharp pencil or a nail, mark the hole locations on the edges of the Dividers. Remove the Windows, and then drill 1/8″ pilot holes in each Divider at the marked locations. Repeat the process for the other Window. Don’t install the Windows until you apply finish to the bird feeder.
7. Attach The Top Cleats
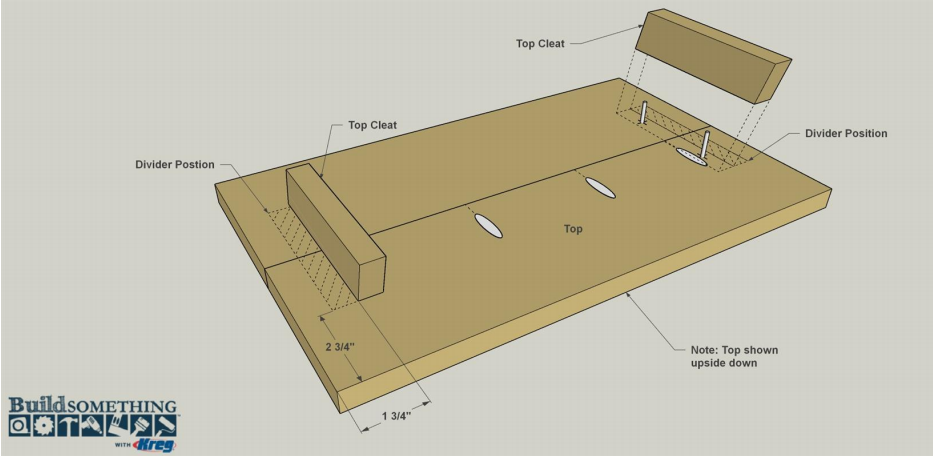
Now you can attach the Top Cleats to the underside of the feeder Top. This is done by following the same procedure you used to attach the Dividers to the feeder Bottom. Before you attach the Cleats to the Top, though, position them temporarily (with masking tape) to ensure that the cleats will slide into place between the two outer Dividers. Then, apply glue to one edge of each Top Cleat, clamp it in place, drill pilot holes, and then drive in #10 x 1 1/2″ exterior pan-head wood screws.
8. Apply Finish (If You Want)
Since a bird feeder sits outside, your first instinct is probably to add finish to protect it. If you do that, though, you need to make sure the finish won’t be toxic to the birds. That’s one reason we built the feeder from cedar. It can be left unfinished and will hold up to the elements just fine. It will turn gray over time, though. You can wipe on a few coats of vegetable or olive oil finish—but only to the outside surfaces, not to the interior areas where birdseed will sit for extended periods. The oil finish will wear away in the weather outdoors, but it’s easy to renew.
9. Attach The Windows & Fill The Feeder
Once the finish dries, you can attach the Windows by driving #10 x 3/4″ exterior pan-head wood screws into the pilot holes you drilled in the dividers. After that, all you have to do is fill it with feed and slip the top onto your feeder. If you want to mount your feeder on a freestanding post, one great way is to attach a metal pipe flange to the underside of the Bottom, making sure it’s centered. Then you can drive a piece of pipe into the ground, and thread the feeder on to it.
Birds find bird feeders by sight. You can learn more about this in my blog post How To Attract Birds To Your Birdfeeder. If you want a quality feed, head over to our shop and browse the link of bird seed supplies.
Conclusion
These simple bird feeder plans are our gift to you for visiting our website. Please consider signing up to get a PDF copy so you can print and take it with you when you shop for the supplies and hardware. I will copy the form below. When you input the information and click Yes, a confirmation page will appear with a blue link to the PDF. Click the Blue link and the PDF will appear. You will not be directed to another website.